Thanks for watching!
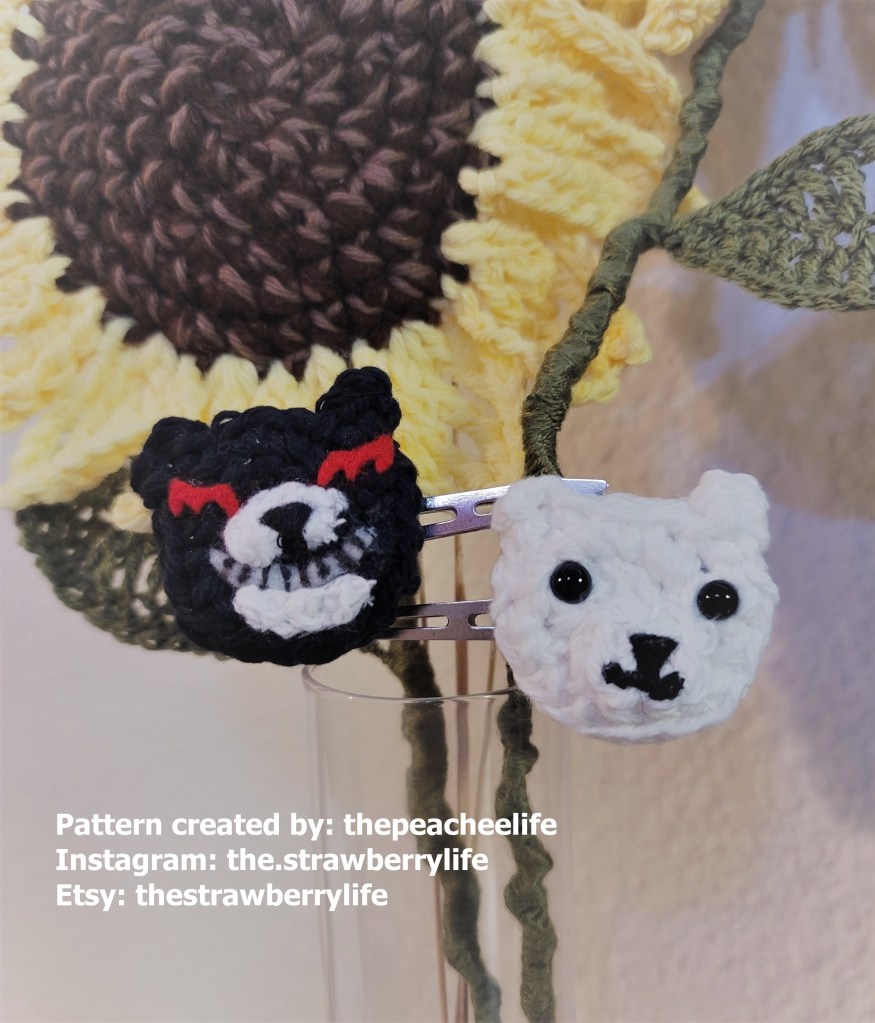
How to: Crochet Spinarak
Thanks for watching!
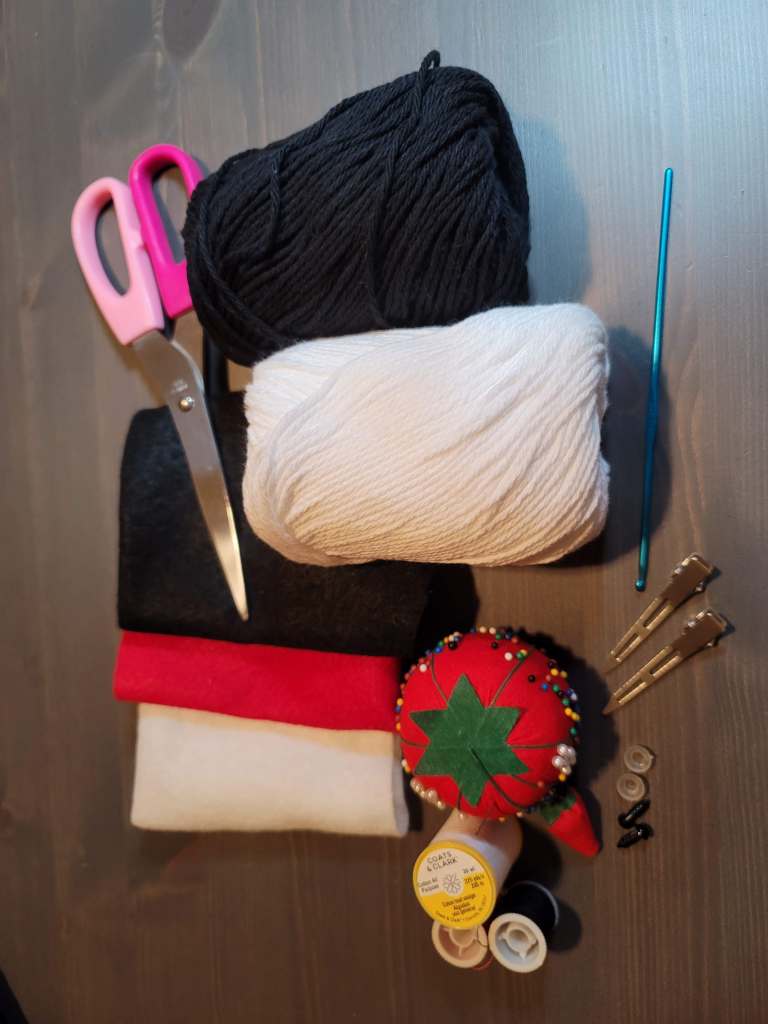
Materials:
Key:
ch = chain
sc = single crochet
dc = double crochet
tc = triple crochet
sl st = slip stitch
dec sc = decrease single crochet
F/O = finish off
Face: (make 4, 2 in white & 2 in black)
*start with white/black yarn*
Rnd 1: 6 sc in Magic Ring (6)
Rnd 2: 2 sc in next sc all around (12)
Rnd 3: REPEAT -1 sc in next sc, 2 sc in next sc around (18)
Rnd 4: sl st, ch 4 then sl st into the same stitch, 4 sl st, ch 4 then sl st into the same stitch (this will create the ears)
F/O & weave in ends
White Monokuma Snout:
*start with white yarn*
Rnd 1: 6 sc in Magic Ring, sl st (6)
F/O & weave in ends
White Monokuma Head Assembly:
Cut a small black felt triangle and glue to the snout we just made. Here you can decide if you want to embroider on the mouth or draw it in with the permanent pen. I opted to try and embroider it on.
Attach the white monokuma snout to one of the white monokuma faces.
Attach the pair of safety button eyes on that same face.
Attach the two white monokuma faces together to add some thickness.
Hot glue gun the white monokuma head to a hair clip. You want to position it so that the white monokuma is going to be clipped on the right side of your head.
Black Monokuma Snout (Top):
*start with white yarn*
ch 3, 2 sc
F/O & weave in ends
Black Monokuma Snout (Bottom):
ch 2
F/O & weave in ends
Black Monokuma Head Assembly:
Cut out a white moon shape for the teeth and glue to one of the black monokuma faces.
Using the permanent pen, I drew on the teeth separations. You can also embroider it on as well if you prefer.
Attach the black monokuma snout (top) above the teeth and the black monokuma snout (bottom) below the teeth.
Cut a small black felt triangle and glue onto the black monokuma snout (top) and embroider on the rest of the mouth.
Cut 2 monokuma eyes from red felt and glue to the black monokuma face.
Attach the two black monokuma faces together to add thickness.
Hot glue gun the black monokuma head to a hair clip. You want to position it so that the white monokuma is going to be clipped on the left side of your head.
