Thanks for watching!
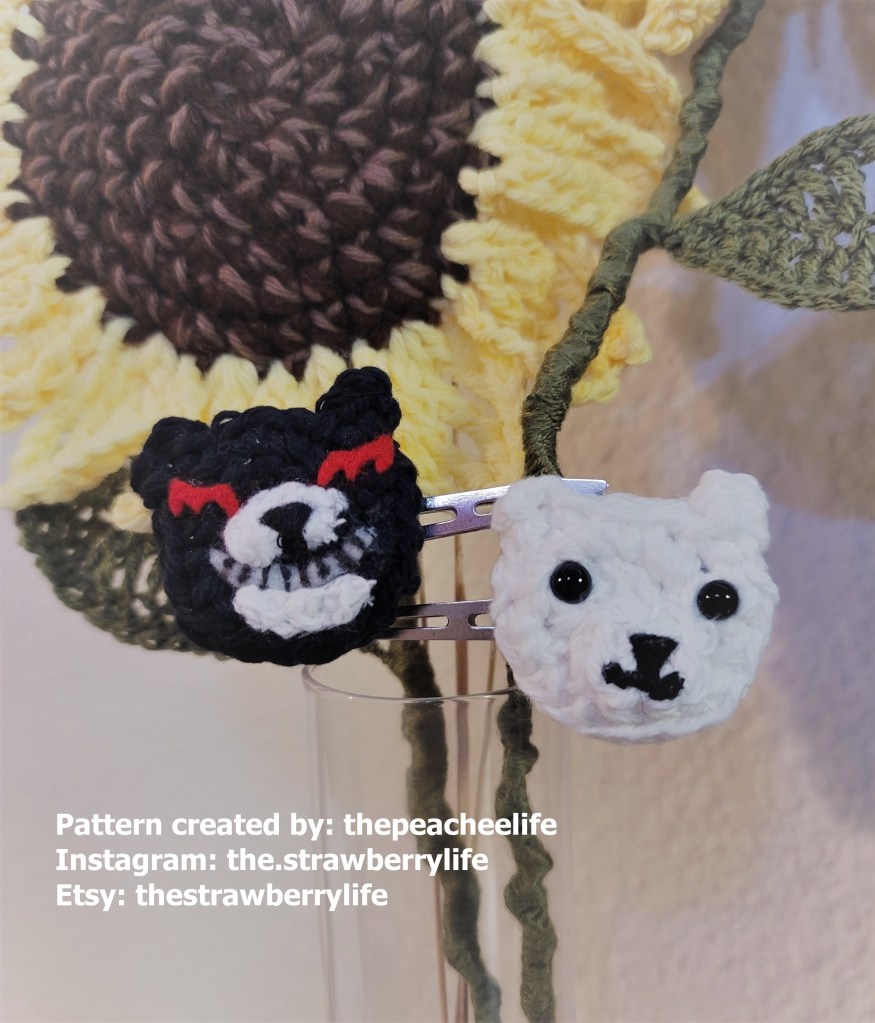
How to: Crochet Spinarak
Thanks for watching!
Materials:
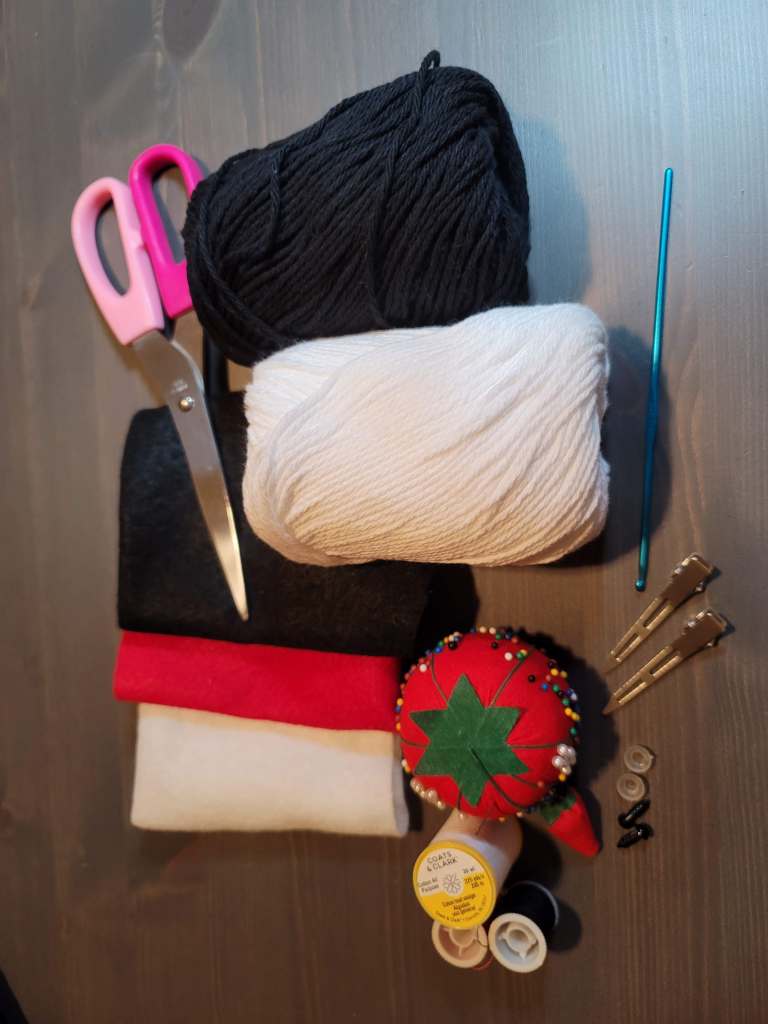
Key:
ch = chain
sc = single crochet
dc = double crochet
tc = triple crochet
sl st = slip stitch
dec sc = decrease single crochet
F/O = finish off
Face: (make 4, 2 in white & 2 in black)
*start with white/black yarn*
Rnd 1: 6 sc in Magic Ring (6)
Rnd 2: 2 sc in next sc all around (12)
Rnd 3: REPEAT -1 sc in next sc, 2 sc in next sc around (18)
Rnd 4: sl st, ch 4 then sl st into the same stitch, 4 sl st, ch 4 then sl st into the same stitch (this will create the ears)
F/O & weave in ends
White Monokuma Snout:
*start with white yarn*
Rnd 1: 6 sc in Magic Ring, sl st (6)
F/O & weave in ends
White Monokuma Head Assembly:
Cut a small black felt triangle and glue to the snout we just made. Here you can decide if you want to embroider on the mouth or draw it in with the permanent pen. I opted to try and embroider it on.
Attach the white monokuma snout to one of the white monokuma faces.
Attach the pair of safety button eyes on that same face.
Attach the two white monokuma faces together to add some thickness.
Hot glue gun the white monokuma head to a hair clip. You want to position it so that the white monokuma is going to be clipped on the right side of your head.
Black Monokuma Snout (Top):
*start with white yarn*
ch 3, 2 sc
F/O & weave in ends
Black Monokuma Snout (Bottom):
ch 2
F/O & weave in ends
Black Monokuma Head Assembly:
Cut out a white moon shape for the teeth and glue to one of the black monokuma faces.
Using the permanent pen, I drew on the teeth separations. You can also embroider it on as well if you prefer.
Attach the black monokuma snout (top) above the teeth and the black monokuma snout (bottom) below the teeth.
Cut a small black felt triangle and glue onto the black monokuma snout (top) and embroider on the rest of the mouth.
Cut 2 monokuma eyes from red felt and glue to the black monokuma face.
Attach the two black monokuma faces together to add thickness.
Hot glue gun the black monokuma head to a hair clip. You want to position it so that the white monokuma is going to be clipped on the left side of your head.
Watch me as I make my favorite Sanrio character in a witch costume. I hope you enjoy and thanks for watching!
Watch me make MapleStory inspired polymer clay charms! Featuring the classics: Orange Mushroom, Slime, Blue Snail, and Zombie Mushroom :)!
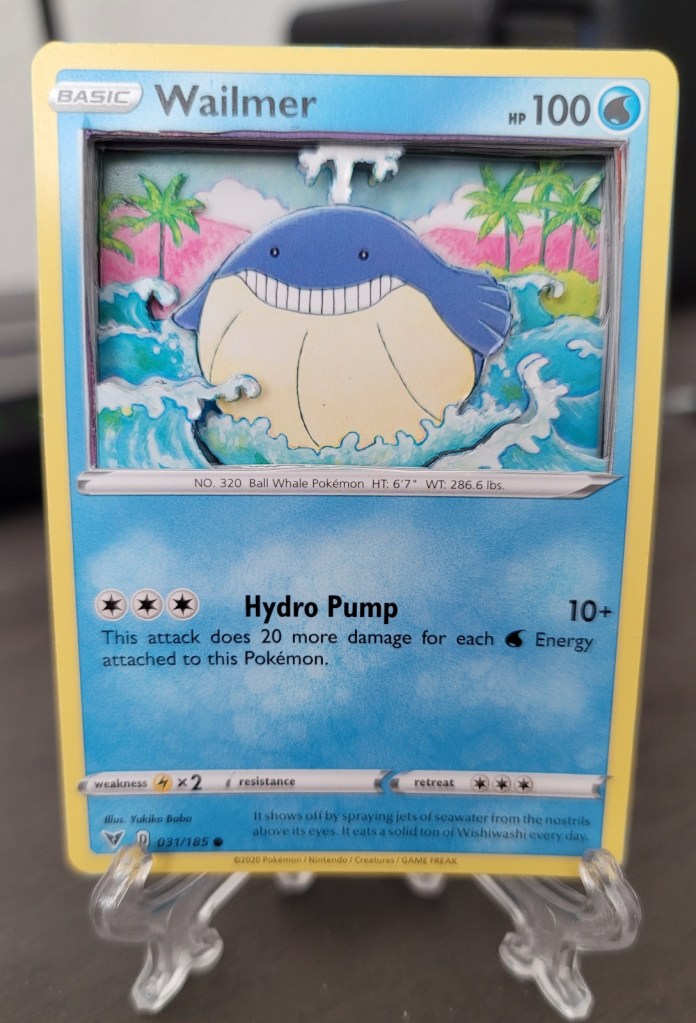
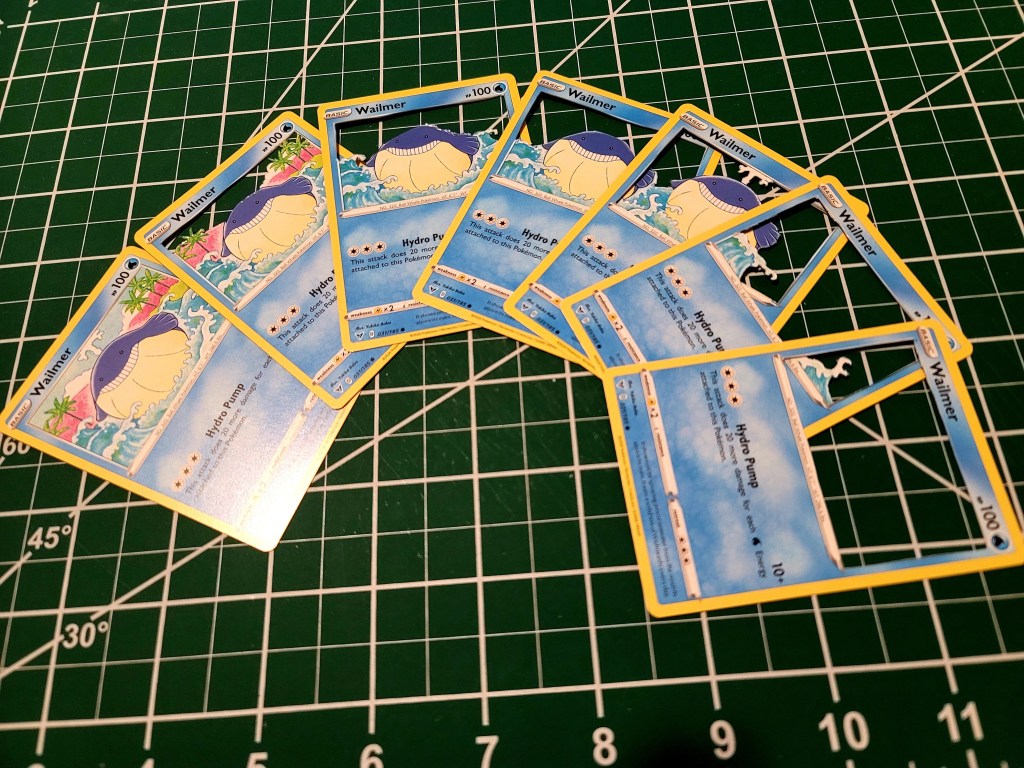
Anyone who buys a bunch of Pokemon Cards knows one thing, they will end up with a ton of duplicates! What do we do with those duplicates? Make a 3D Pokemon card! So…I dusted off my boxes of duplicates and scavenged for some cute Pokemon Cards to use.
Here is my attempt at creating a Wailmer 3D Pokemon card to display.
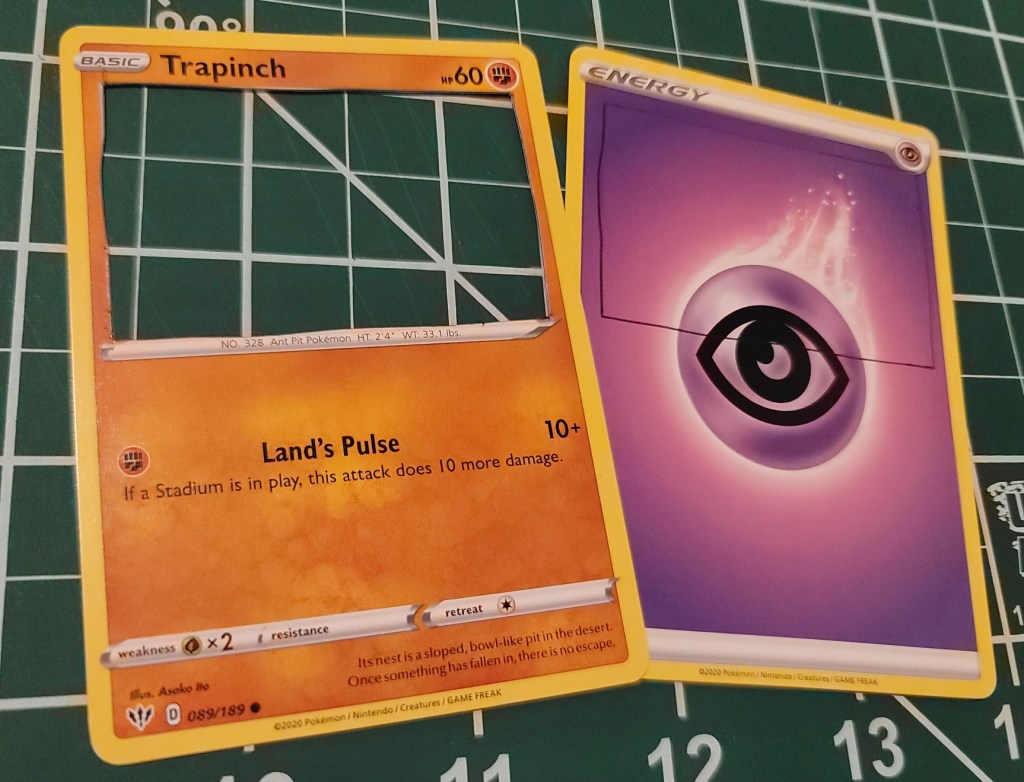
First, you need your materials which includes: duplicates of the main Pokemon card, a box cutter, glue, filler cards such as energies or TCG codes and finally a bit of paint for the detailing.
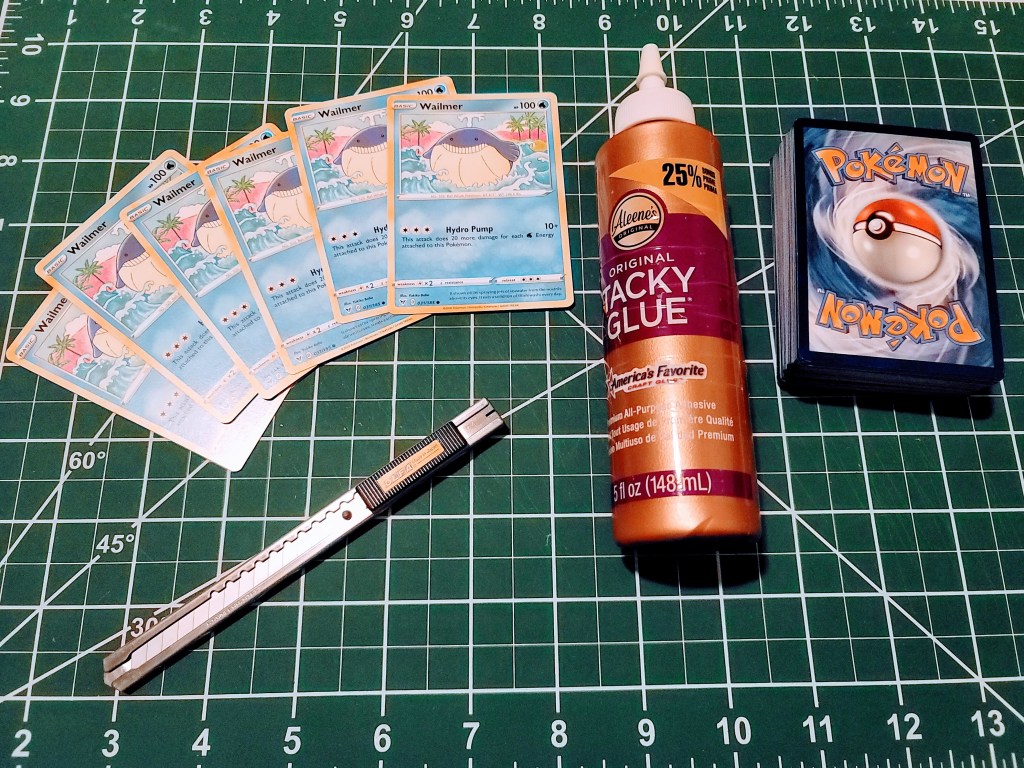
You want to start by mapping out the layers of your 3D piece. Which part of the image do you want to go in front? Which part do you want in the back? Where do you want more depth. Also do not forget to consider one of the duplicates as a background and one for the front piece. Below, I have cut out all of the layers, starting from right to left, front to back!
Then, you need to start cutting your filler pieces to create depth. I decided to separate each layer with 3 filler cards with the exception of there being 5 filler cards between the wailmer layer and the front wave layer. I used another Pokemon card as a stencil to draw on the boxes that need to be cut from the filler cards.
Starting from the background layer, glue piece by piece with the filler layer cards in between each layer. Make sure the cards are straight and clean up any glue messes! It will create the cool depth effect.
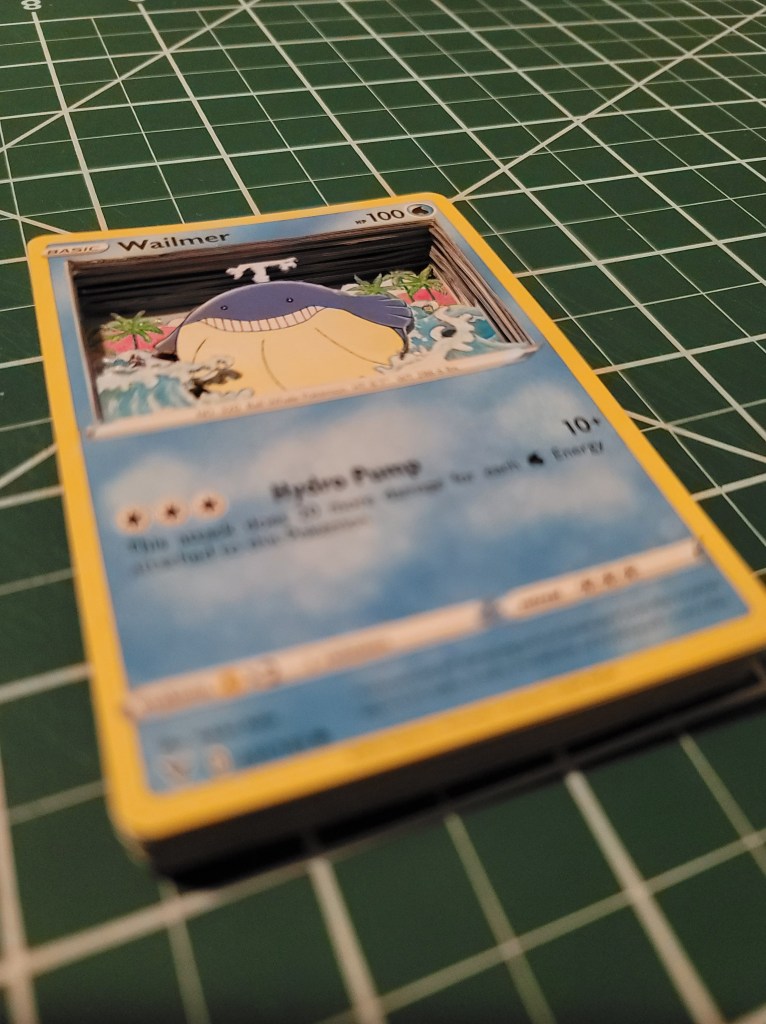
Once I was satisfied and the glue dried, I went ahead and painted the edges of the cards for a finishing touch!
Ta-dah!
